Orb Composer is the name of the first Artificial Intelligence designed for music composers. More than 5 years of research and development were necessary to create this smart tool for composers, bands, orchestrators, to help them experiment new musical ideas and enhance their creativity.
Orb Composer is not a replacement for a composer. Instead, it is a tool for ideas, and to create full orchestrations, songs, etc. very quickly, which you can then keep as they are, or edit further in your DAW of choice by exporting MIDI or Audio. You are still the artist, and Orb Composer relies on intelligent decision making from the composer to define what it will write.
- First for PC users, simply run the .exe file, and install the software as you would any other. You will need to then restart your PC.
- For MAC users, the installation is similar, but you also have to install Orb’s MIDI drivers separately.
- You can download them here: https://www.orbplugins.com/midi-driver/
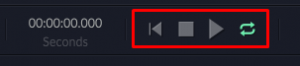
- Currently, MIDI support for Orb Composer S is only basic transport control (Play/Stop/Back). Extended support for midi will be included in future versions, but those are the current limitations.
- Orb also has a number of MIDI channels that are installed on your PC when you install Orb Composer. Here is a complete list of all Orb Composer’s MIDI ports for your reference.
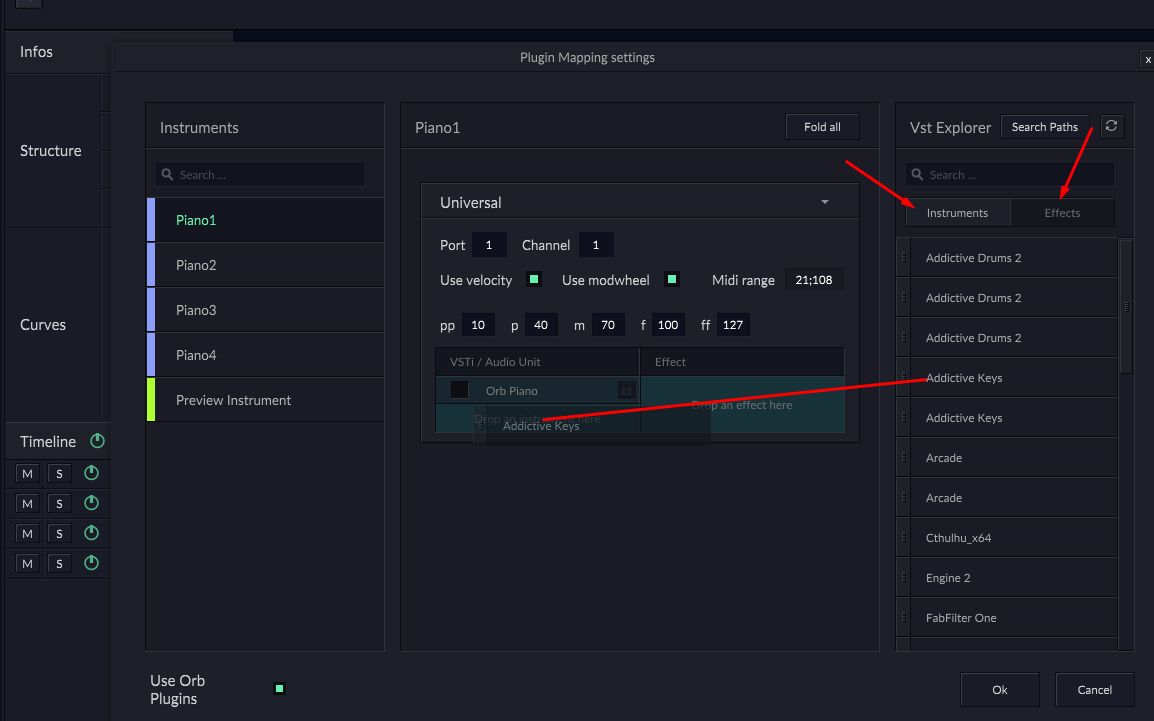
- VST (Audio Units on Mac OS) scanning enables you to use external VSTs in Orb Composer S, such as Kontakt, Omnisphere, and many others, including effects plugins.
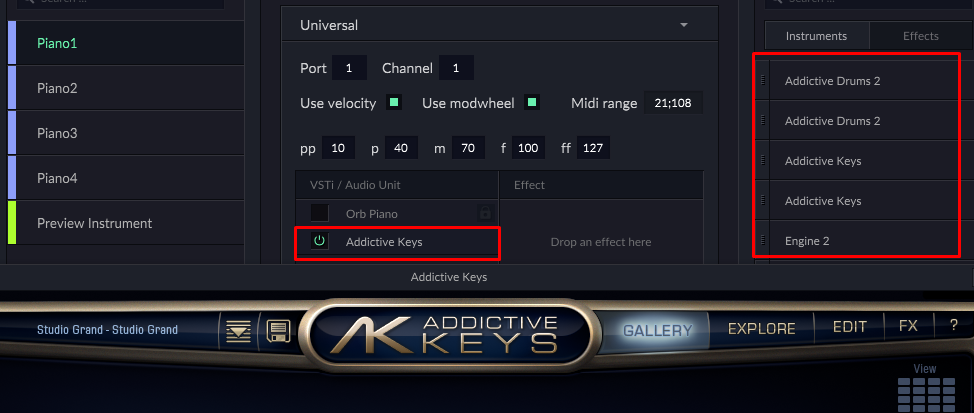
- You can access the VSTs and scan for them in any of three ways. Press ctrl+shift+p, click on an instrument name on the left side of the main window, or click the Edit button at the top, and click on Instrument Preferences.
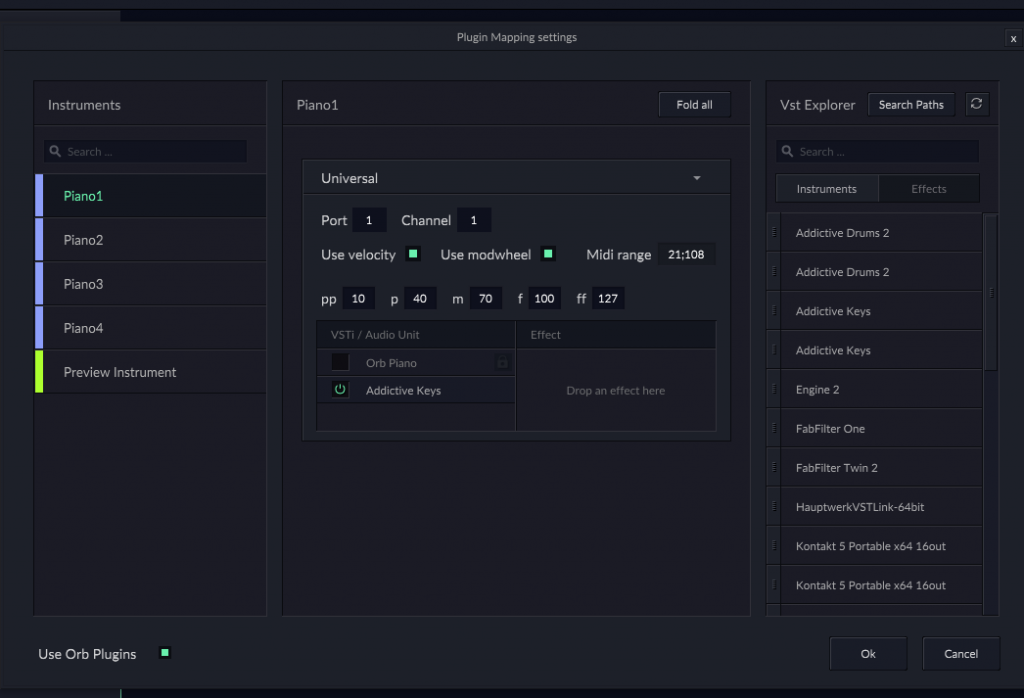
- Once here, you can then click on “Search Paths” next to the text “VST Explorer”. Doing this opens a dialog box that will let you choose the paths to scan for VSTs and plugins. You can define as many as you need to.
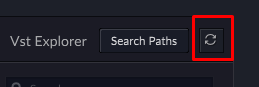
- Once you have defined your paths, you can then click OK, and then in the Instrument Preferences window, click the “circle arrows” button to refresh your VST list.
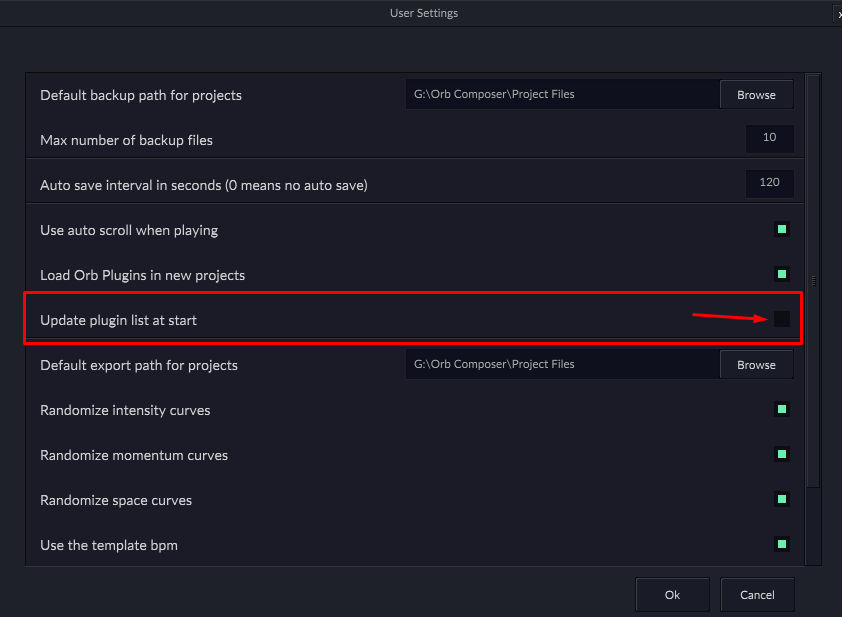
- VST folders are always scanned on startup of Orb Composer. To disable this, go to Edit, then Show user settings, then uncheck the box that says “Update plugin list at start”
- It’s important to note that while Orb Composer S supports VST3, it is recommended to use VST 2, as VST 3 support is only basic in this version.
- Previously in Orb Composer, you had to connect Orb Composer to a DAW, which was quite tedious to setup, and much less reliable than Orb Composer S. Orb Composer S is a standalone software that enables you to have a much less intrusive and complicated workflow. You simply load all of your VST instruments directly into each articulation or instrument you are using, and you can even add VST effects to each articulation as well.
- However, Orb Composer has some limitations, and while you may be satisfied with the results in Orb, you might want to edit MIDI or WAV files separately. It is at this point that you would export all of your files, and open them in the DAW of your choosing for further editing. We will go over this more in detail later.
- While the basic UI of Orb Composer hasn’t changed much in Orb Composer S, there are some key features that should be noted, and we will review the UI.
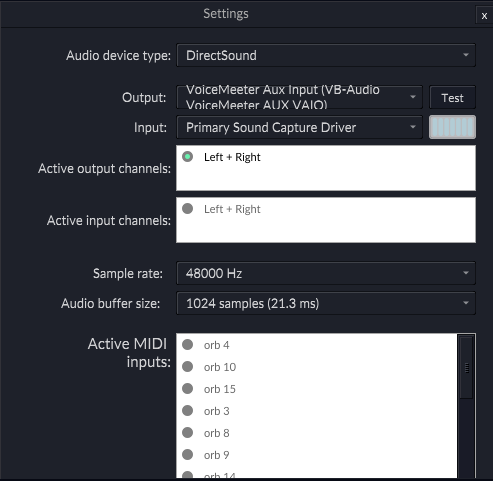
- There is a new menu in Orb Composer S for defining sound output settings, and choosing the sample rate, and hz of your project. This is an important thing to set right. Set your samples too high and your latency will have a really long delay in listening, but set it too low and you’ll run into issues with cutouts. We suggest somewhere between 1024 and 2048 samples for optimal latency and least amount of cutting out issues.
- Video Explanation
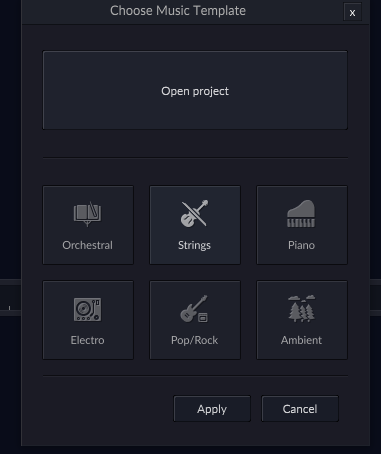
- First, you’ll want to select an existing template, or build your own, by hitting “CANCEL” and then dragging any instruments you want into the timeline.
- For any instruments you add, open the instrument settings by clicking on the instrument in the timeline, or hitting CTRL+SHIFT+P, and then drag in any instruments you’d like from your VST list.
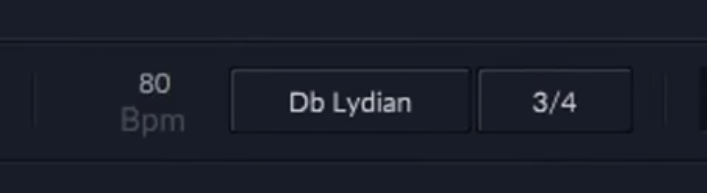
- Next, finalize your default track settings (BPM, Key, Time Signature)
- Then, start picking your track structure by choosing your blocks. Intro, Theme, Transition, and End blocks.
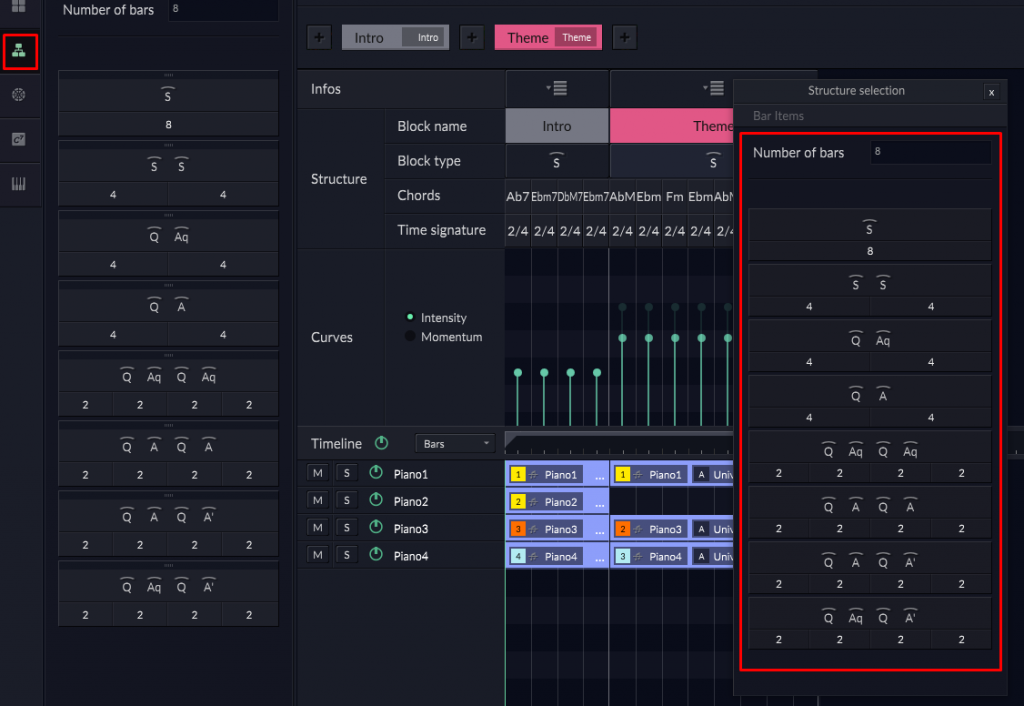
- Choose and experiment with different block structures.
- Once you have finished building your track, you can then start to experiment and listen to what Orb Composer has written. For instance, you can double click on any clip and see detailed settings that will let you customize everything Orb Composer does with that clip.
- Video Explanation
- https://www.youtube.com/watch?v=q8uyW9y1VRo&t=619s
- Refreshing melody and chords is easy and there’s two ways to do it.
- One is to refresh everything using the main menu buttons:
![]()
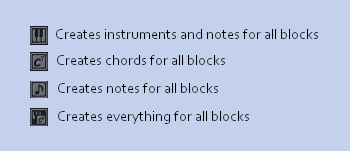
- You can also do this per block:
![]()
- Video Explanation
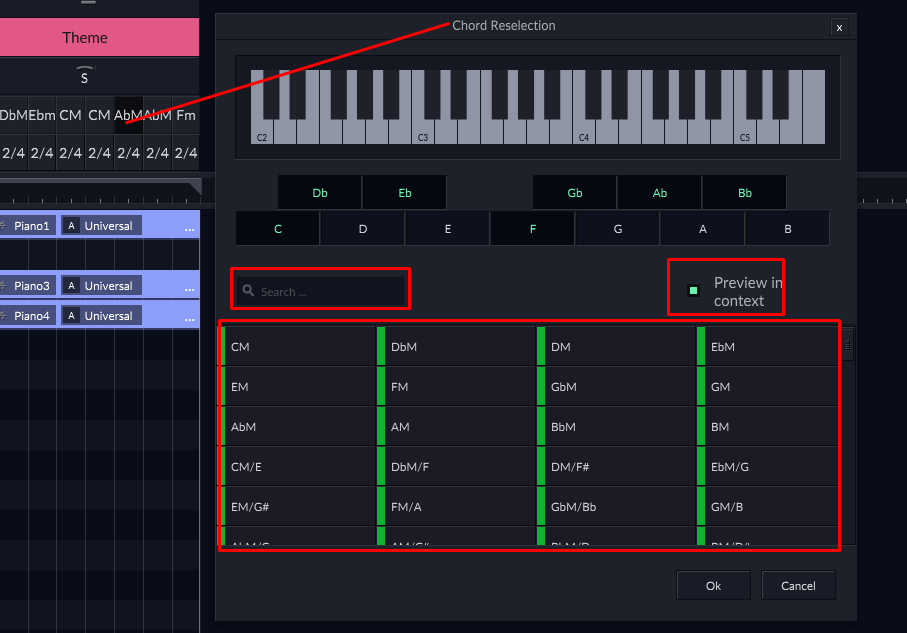
- Building your own chord progressions can be done in two ways.
- You can choose from a list of dozens of premade chord progressions

- Simply drag and drop the chord progression you want to use into the chords section of your blocks
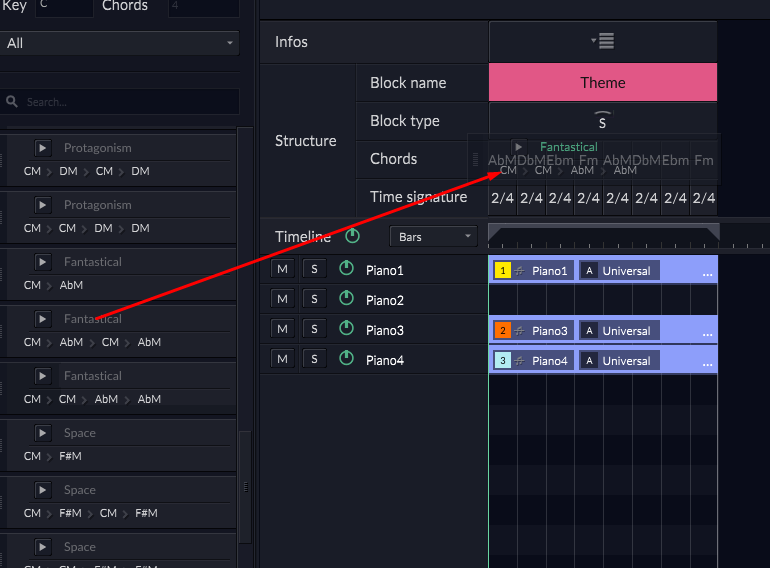
- You can also double click on any chord in the Chords section and choose custom chords, and hear them in context.
- Exporting MIDI
- Go to File > Export MIDI
- Choose where you want to save the file, and give it a name
- Click Save
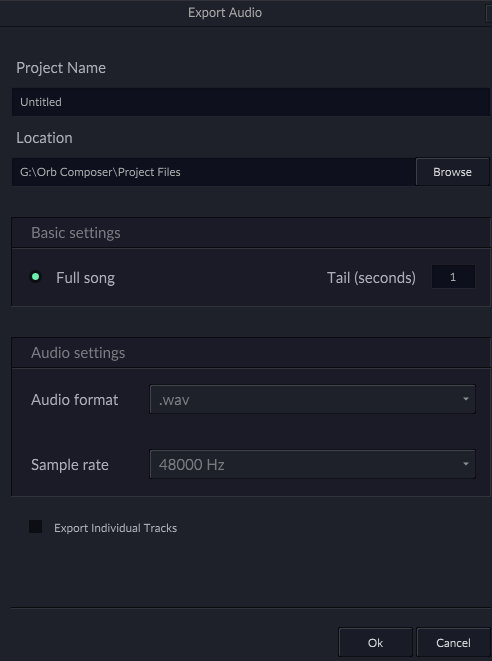
- Exporting Audio
- Go to File > Export Audio
- In the dialog box, select your Project Name, tail length, whether you want to have individual tracks or the full song mixed together, and the location to save the file
- It is recommended that if you have instruments or templates you want to use frequently that you start a new file from scratch, and then save the project as a TEMPLATE file to use for future tracks.
- This will prevent you needing to add instruments/VSTs/effects/etc.
- You can create as many templates as you need to as many different styles and projects as you require, and this is the recommended way to use Orb Composer S to ensure faster workflows for ongoing composition projects.
- The MIDI Editor is a way for you to change the notes produced automatically by Orb Composer.
- By default the MIDI Editor shows all of the notes for every instrument in your project. However, the instrument you have selected will show the notes as green, and all others will be grayed out. This allows you to easily see where other instruments are playing.
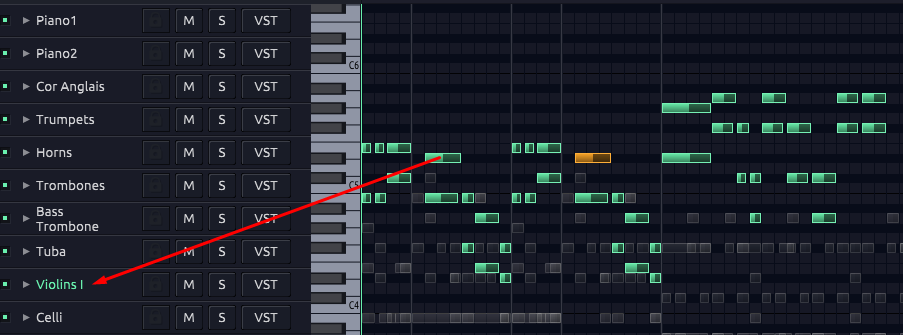
- Orange shaded notes are the notes you have selected to edit, and allows you to lengthen, shorten, or move them up and down along the piano roll.
- Selecting an instrument on the left side will allow you to edit the notes for that instrument.
- By holding CTRL/CMD and scrolling up/down will resize the vertical size of the MIDI Editor
- The brightness slider allows you to change the brightness of the notes in the MIDI Editor

- You can detach the MIDI Editor from the main window by pressing the double square icon, and redock using the same button.
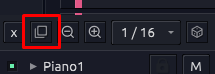
- You can zoom horizontally in or out by clicking the +/- magnifier icons.
![]()
- You can quickly change the Velocity/ModWheel of the notes by clicking on a single line and raising it up or down, or by holding CTRL/CMD and running your mouse across the Velocity/ModWheel Area

- This same procedure can be used anywhere there are lines or alterable parameters.
- You can also add other CC controls for your instruments and adjust them in the same way using the “+Add CC” button, which will allow you to have more control over your VSTs/AUs.
- To import and harmonize a melody, simply import your melody into your block and Orb Composer will instantly analyze and create chords and supporting elements around the melody you import.
- By default, any imported melody will always produce the same chords based on the analysis of the melody if the same melody is imported again. In other words, you may get different orchestrations, but your chord selections will remain the same, as Orb Composer is taking its best approximation of what chord is expected for a particular bar.
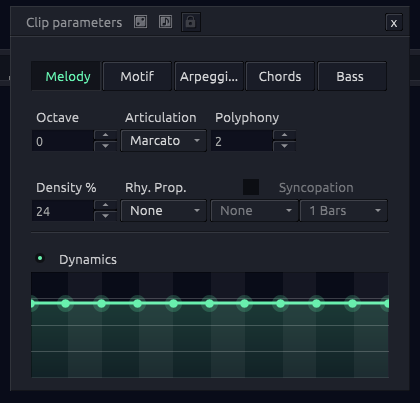
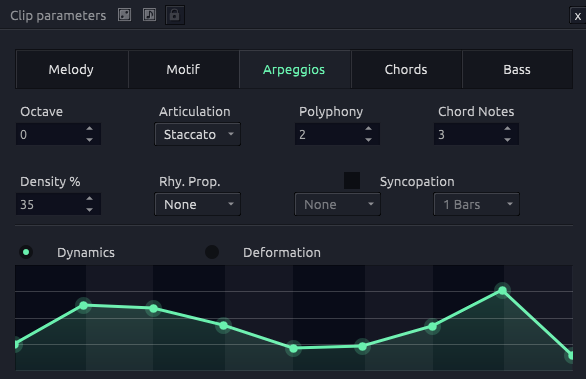
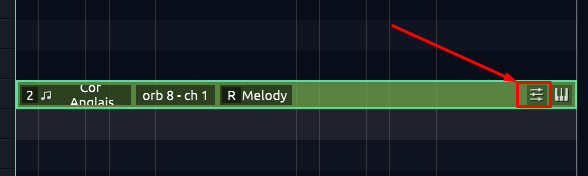
- The clip editing interface in 1.5+ has been changed to be one single window which allows you to edit all parameters of a clip, rather than the previous tabbed version. This simplifies your music editing workflow.
- To access the Clip Editing Interface, click on the sliders icon on the clip
- Density increases or decreases the number of notes per bar. Higher density results in more notes per bar. Lower density results in fewer notes per bar.
- Rhy. Prop. (meaning Rhythm Properties), is used to create quick rhythmic repetitive patterns without having to rely on Orb Composer to hopefully randomly generate such a pattern. For instance, 16th will create entire bars of 16th notes in a sequential pattern and follow your chord progression. 16th on beat will create 16th notes on every beat, off beat will be a 16th note on every off beat. The same rules apply to 8th notes.
- The drum sequencer allows you to quickly create custom rhythms and edit the rhythms generated by Orb Composer’s AI.
- When you change the sequencer, the MIDI will automatically update.
- Keep in mind that the sequencer maps to General MIDI Drums, so if you’re using drums that are not aligned with General MIDI, you may not hear your output until you move the notes generated for the clip(s) you’re working on. However, also note:
- If you edit the MIDI of the drum clip in any way, the sequencer will no longer function to edit the MIDI.
Transition Pattern – The transition pattern differs from the main pattern in that it will fill in the last bar of a block with a different pattern than what is used in the Main Pattern.
- High or low deformation allows for midstream pattern changes within single blocks, which results in more unique patterns that continue through a piece. High deformation increases the spread of patterns, and low deformation decreases the spread of patterns.